
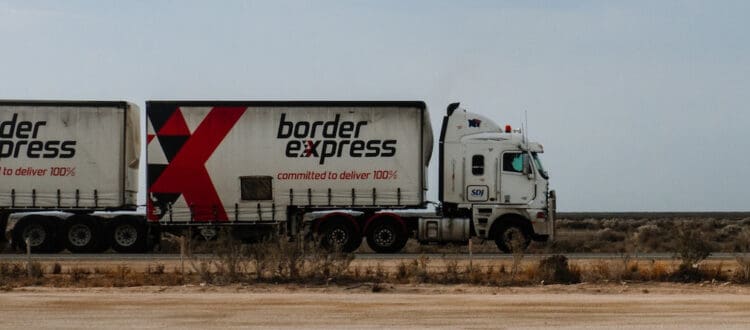
Large decals for trailers are a great way to make a statement and grab attention on the road. These eye-catching graphics can transform a plain trailer into a mobile advertisement for businesses, events, or personal branding.
Whether you’re a company looking to promote your products or services, or an individual looking to showcase your creativity, large decals allow you to create a bold and memorable impression. With their durable materials and weather-resistant properties, these decals can withstand the harsh conditions of the road, ensuring your message stays visible and vibrant for miles. From vibrant digitally-printed colors and striking designs, to custom shapes and sizes, they offer endless possibilities for conveying your message effectively and stylishly.
What Material are Large Decals for Trailers Made of?
 They are typically made of high-quality vinyl materials that are specifically designed to withstand the outdoor elements and ensure longevity. The decal material itself is a durable vinyl, known for its flexibility and resistance to fading, cracking, and peeling.
This vinyl can be printed with high-resolution graphics and vibrant colors using advanced digital printing technologies. UV inks are often used in the printing process, providing additional protection against fading caused by sun exposure.
The decals are backed with a strong but removable adhesive that securely adheres to the trailer’s surface, ensuring they stay in place even when exposed to wind, rain, snow or other weather conditions. Finally, a finish such as a gloss or matte coating may be applied to the decals to enhance their appearance and provide an extra layer of protection against scratches and abrasions.
Common Sizes
Large decals for trailers come in a variety of sizes to accommodate different trailers and design preferences. The common size-range decals is from small to around 40 feet in width and 8 feet in height, although spicing will occur every 6-10 feet or so due to printer size constraints. These larger sizes are ideal for maximizing visibility and impact, especially when placed on the sides or back of the trailer.
The specific size of the decal will depend on the available space on the trailer and the desired design or message. Some decals may cover the entire side or back of the trailer, while others may be smaller and used in combination with other decals or text. Ultimately, the size of the decal should be chosen based on the trailer’s dimensions and the overall aesthetic you want to achieve.
How to Install Large Decals on a Trailer
Here are the simple steps for installing large decals on a trailer using both dry mounting and wet mounting methods:
Dry Mounting Method:
- Have 2 experienced installers available for installing large decals – It is imperative that you have an experienced assistant, or you will almost always have a “foldover accident” due to the size of these decals.
- Prepare the surface – Clean the trailer surface thoroughly to ensure it is free from dirt, dust, and any oils or residues that may hinder adhesion.
- Measure and position – Measure and mark the desired position for the decal on the trailer. Use masking tape or a level to ensure accurate placement.
- Peel off backing – Carefully peel off the backing paper from the decal, starting from one corner.
- Apply decal – Begin applying the decal to the trailer surface, starting from one end. Use a large squeegee to smooth out any air bubbles and press the decal firmly onto the surface.
- Work from one end to the other – Slowly work your way across the decal, smoothing it out and removing any air bubbles as you go.
- Trim excess – If necessary, trim any excess decal material using an Exacto® knife or utility knife..
- Final smoothing – Once the decal is applied, go over the entire surface again with the squeegee or plastic card, applying firm pressure to ensure secure adhesion.
- Allow to set – Let the decal sit undisturbed for at least 24 hours at 55F to allow the adhesive to fully set.
Wet Mounting Method:
- Have 2 experienced installers available for installing large decals – see No. 1 in the previous section on dry mounting.
- Prepare the surface – Clean the window surface thoroughly as in the dry mounting method.
- Measure and position – Measure and mark the desired position for the decal on the window, using masking tape or a level as a guide.
- Mix a solution – In a spray bottle, mix a solution of water and a few drops of mild soap or baby shampoo. Shake well to ensure it’s thoroughly mixed.
- Spray the surface – Lightly spray the trailer surface with the soapy water solution, ensuring it is evenly wet. Avoid getting the backing paper wet.
- Peel off backing – Peel off the backing paper from the decal, starting from one corner.
- Apply decal – Carefully position the decal onto the wet surface. The soapy water will allow you to adjust the decal’s position if needed.
- Smooth out – Using a squeegee or a plastic card, gently smooth out the decal starting from the center and working towards the edges. This will help remove any remaining air bubbles and excess water.
- Allow to dry and set – Leave the decal undisturbed for several hours, allowing it to dry completely and the adhesive to bond with the surface.
Remember to carefully read and follow the specific instructions provided by the decal manufacturer for the best results.
How to Remove Large Decals from Trailer Surfaces?
Here are the simple steps on how to remove decals from trailers:
- Heat the decal – Use a heat gun or hairdryer to warm up the decal. Start at one corner and work your way across the decal, heating it evenly. This will help soften the adhesive and make it easier to remove.
- Lift the decal – Once the decal is heated, use a plastic scraper or credit card to gently lift one corner of the decal. Be careful not to scratch or damage the surface underneath the decal.
- Peel off the decal – Carefully and slowly peel off the decal from the surface, keeping it at a 340-degree angle to the surface to avoid tearing or leaving adhesive residue.
- Remove adhesive residue – If there is any remaining adhesive residue, use a gentle adhesive remover or rubbing alcohol to dissolve it. Apply the remover with a cloth or sponge and let it sit for a few minutes before wiping off.
- Clean the surface – Once the decal and adhesive residue are removed, clean the surface thoroughly with soap and water to remove any residue or cleaner.
- Dry the surface – Use a clean, dry cloth or towel to dry off the surface completely.
Remember to wear gloves and protect your skin and eyes while using a heat gun or adhesive remover.
How Much Does It Cost to Decal a Trailer?
 The cost of decaling a trailer can vary depending on several factors. The size of the trailer, the complexity of the design, and the quality of the materials used all play a role in determining the cost. Generally, smaller decals or simple designs will be more affordable, while larger decals or intricate designs may cost more.
Custom graphics and personalized designs may also incur additional charges. The cost may also include the price of the decal itself, the labor for installation, and any additional services such as design consultation or customization. It’s best to reach out to a professional decal provider or sign shop to get a personalized quote based on your specific trailer and decal requirements.
What Surfaces Can Trailer Decals be Placed on?
Trailer decals can be placed on a variety of surfaces, including metal, aluminum, fiberglass, and some types of plastic. These surfaces are often smooth and provide a good adhesion surface for decals. It’s important to note that decals may adhere differently to different surfaces, so it’s recommended to check the manufacturer’s instructions or consult with a professional for specific surface compatibility.
It’s also essential to ensure that the surface is clean and free from dirt, dust, grease, or other contaminants before applying the decal. Proper surface preparation will help establish a strong bond between the decal and the trailer, ensuring durability and longevity of the decal.
Will the Trailer Decal harm the Surface Paint?
 Trailer decals, when applied and removed correctly, should not harm the surface paint. However, there are a few factors to consider. The condition of the surface paint prior to applying the decal can play a role.
If the surface paint is already damaged, oxidized, or peeling, there is a possibility that the decal adhesive may cause some of the paint to come off when removing the decal. It is also important to ensure that the decal is applied to a clean and properly prepared surface. If the surface is dirty, greasy, or has residue, it could affect the adhesion.
Using a heat gun or hairdryer to warm up the decal during removal can help soften the adhesive and minimize any potential harm to the surface paint. It is always a good idea to test the decal on a small and inconspicuous area of the trailer before applying it to the entire surface to ensure compatibility and prevent any unforeseen damage.
Are Large Decals for Trailers Weatherproof?
They are weatherproof. They are typically made with high-quality vinyl material and premium adhesive that can withstand various weather conditions. These decals are designed to withstand exposure to sunlight, rain, snow, and wind without fading or deteriorating. Some manufacturers even offer UV-resistant inks or laminates for added durability and protection against the elements.
It’s essential to choose decals specifically labeled as weatherproof or ask the decal provider for confirmation to ensure the longevity and performance of the decal, especially if the trailer will be exposed to harsh weather conditions for an extended period.
What is the Lifespan of Large Decals for Trailers?
 The lifespan can vary depending on several factors including the quality of materials used, the care taken during installation, and the environment in which the trailer is used.
Generally, high-quality vinyl decals that are properly installed and well-maintained can last anywhere from 2-3 years or more, although fleet trucks – such as those owned by MCDonalds® or the like – are often updated annually. Some factors that can affect the lifespan of the decal include exposure to sunlight, extreme temperatures, harsh weather conditions, and frequent abrasion or contact with objects.
Regular cleaning and maintenance, such as avoiding abrasive cleaning agents and ensuring the decal is free from dirt and debris, can help prolong its lifespan. It’s important to note that individual experiences may vary, and the manufacturer’s recommendations and instructions should be followed to maximize the lifespan of the decal.
Conclusion
Trailer Decals offer a customizable and effective way to advertise, brand, or personalize a trailer. These decals are made of high-quality vinyl material with premium adhesive that is typically easy to install and remove if necessary. It is important to choose the right decals to ensure longevity and performance. For custom large decals for trailers, CHECK HERE.
 (1 votes, average: 5.00 out of 5)
Popular Posts:

